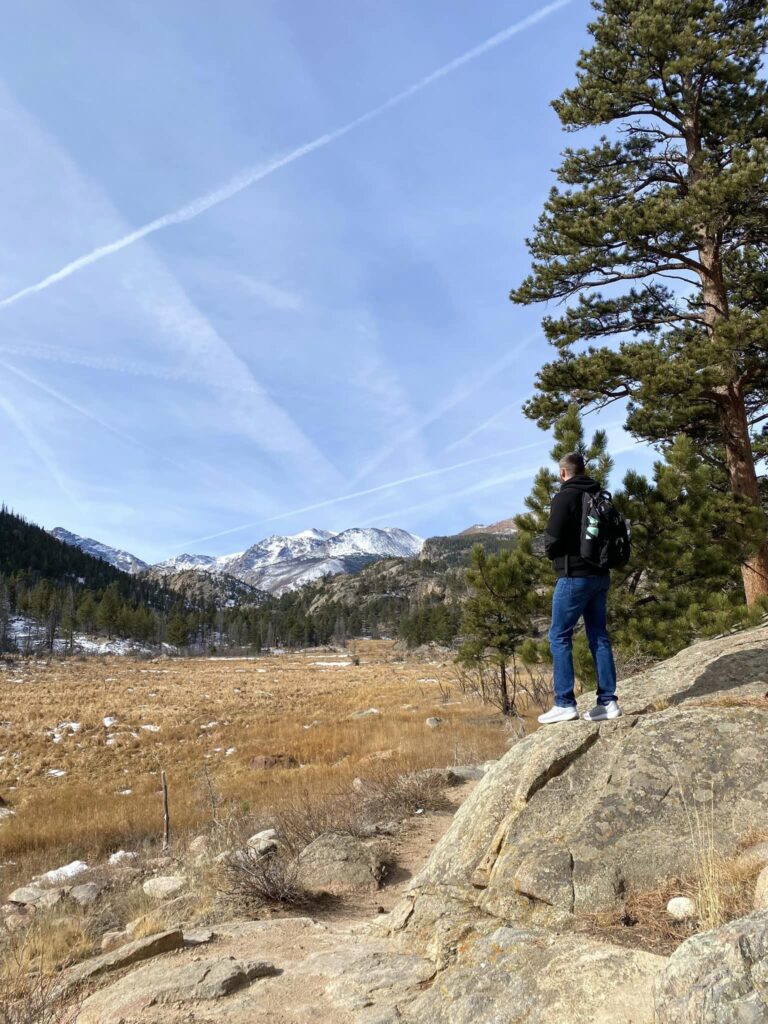
Rocky Mountain National Park (RMNP) during the winter is breathtaking. Seriously! We felt like we were in a winter wonderland as the mountains and trails were covered in fresh white snow. The mountain peaks were also covered in snow, making for a beautiful view of the Rocky Mountains. There were many days that the fog surrounded the peak of the mountains in the morning providing a strikingly majestic view. We were mesmerized by these towering mountains. The temperatures were cold with the average temperature being in the 30s. There were days when the temperature got up to close to 50 degrees. Be sure to pack warm layers when hiking at RMNP.
We visited during a weekend trip in November 2022. Winter is considered one of the best times to visit. Why? There are way fewer crowds and parking lots and roads are way less busy. November through April is considered the best months to visit to avoid the crowds of RMNP.
How to Get There
If you don’t live within proximity to the RMNP area, then your best bet is flying into Denver International Airport (DEN). Denver International Airport is only 1 hour and 21 minutes away from RMNP making it the closest airport to fly into. Denver International Airport is the largest airport in America and the second-largest airport in the world. This airport is huge. Therefore, it is important that you plan ahead and arrive early for your flight back. We are talking at least 2 hours before your flight departure time. Denver International Airport has three security checkpoints which can make things confusing. If you get lost or confused, you will have maps that you can consult and there are workers stationed to answer your questions! Ask these workers because they are helpful and can point you in the right direction!
The trip from Denver to RMNP is beautiful and you will be keeping an eye on the mountains beginning to form as you get closer to RMNP. Note: There are tolls that you will go through near Denver on this route. Those tolls will total to be a little over $40.00.
Getting Around
Considering that there is no park shuttle or public
transportation, you will need to have your own car. In our second blog, we detailed
an inexpensive method of renting a vehicle; however, that method wasn’t the
best for the long 7-day haul across 3 states and multiple national parks. This
trip, however, is a perfect opportunity for that method. Yes, we are talking
about Turo…again. Considering you will be flying into Denver and departing from
Denver, you will be able to utilize Turo. Briefly, Turo is the Airbnb or cars
as you rent a car from the owner to drive for the duration of your trip. You
can select the Denver Airport as your pick-up and drop-off location. This will
save you time as you can hop into your vehicle as soon as you exit the airport.
This will save you money as well as you won’t be hit with hidden fees like you
are with car rental companies. If you want a more detailed description of Turo,
check out our 7-Day Itinerary to Utah and Arizona national and state parks. If
you are like us, and heard it can save you time and money, you’re already sold!
Where to Stay
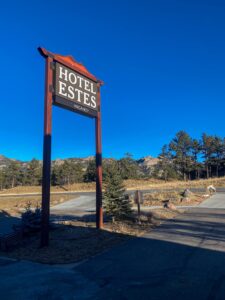
We stayed at Hotel Estes during our weekend trip. Hotel Estes is within proximity to shopping in the area, RMNP itself, and so many awesome restaurants. The best part? Hotel Estes fit within our small budget for this weekend trip. It’s important that we remind you that we are ~travelers~ and not vacationers. This means, sometimes we pick cheaper accommodations to be able to see and do more. Is Hotel Estes the most amazing accommodation that we have stayed at? No. Yet, it served its purpose in so many ways. The staff were so nice, breakfast and coffee were included in the stay, and the rooms were clean and comfortable. Would we recommend this hotel to you? Absolutely! And that’s why we are!
Cost of Rocky Mountain National Park
There is an entrance fee of $35.00 that will last for 7 days. You can also use your America the Beautiful pass which is $80.00. This pass is totally worth it if you plan to see multiple national parks within the year. Remember, there are 16 national parks that do not charge an entrance fee.
Weekend Itinerary (3 Days)
It’s important to keep in mind that there are closures during the winter season. Two of the visitor centers that are closed during the winter are the Moraine Park Visitor Center and Alpine Visitor Center. There are some road closures as well which include Trail Ridge Road, Old Fall River Road, and Endovalley road. As always, go to Rocky Mountain National Park’s official page to check road closure before and during your visit.
There are so many hikes that you can still do in the winter at RMNP! We are going to share the hikes we completed during our trip. We will also share some hikes with you that are options that we did not complete and thus cannot share an opinion on.
Options that we did not hike but you can research and hike yourself: Loch Vale (5.4 miles), Lilly Ridge (1.2 miles), and Alberta Falls (1.4 miles). It is important to remember that hiking in snow is much more difficult and will take you longer.
Day 1
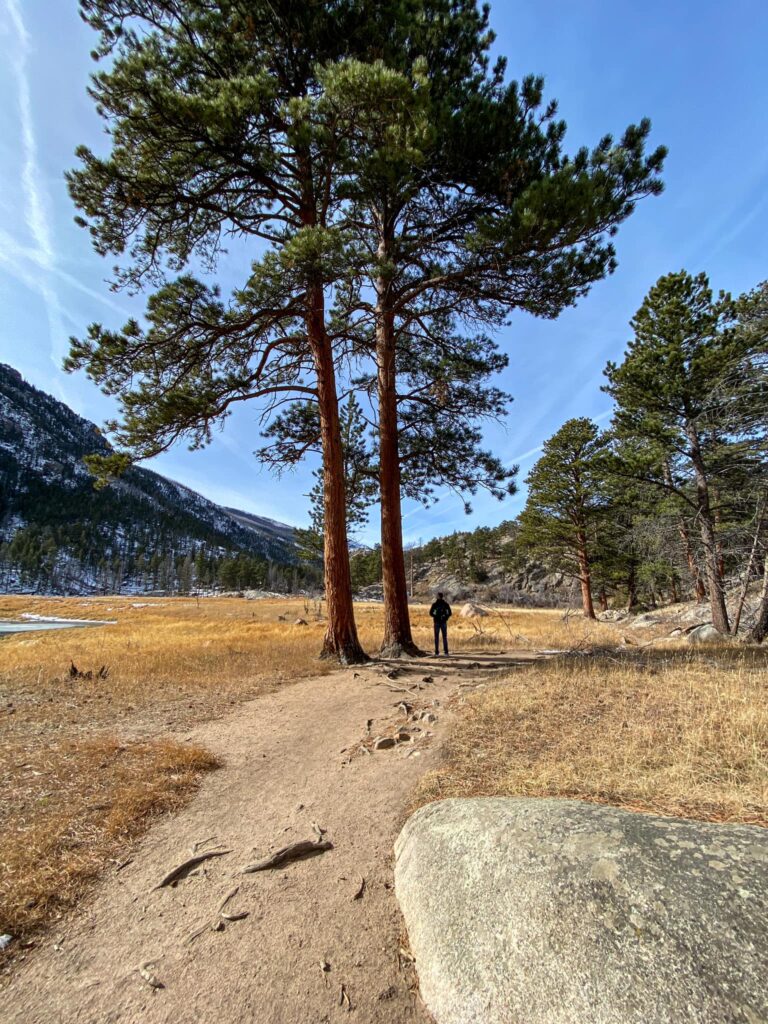
We arrived at RMNP at 11:00 A.M. and were ready to begin hiking! We decided to start the trip by hiking to Lake Haiyaha, a 3.9-mile hike to a stunning, green-colored lake. You will begin your trip up the mountain at 9475 feet and gain approximately 865 feet. The trail is of moderate difficulty, but the snow really pushes this up to a higher difficulty. The trailhead begins at Bear Lake Trailhead which is located at the end of Bear Lake Road. When we arrived, the parking lot was almost halfway full; however, the parking lot is huge. You should have no difficulty findings a place to park. If you want to visit Bear Lake on this hike as well, you can take the trail that splits off to the right. These trails are marked at every intersection, so it is very easy to stay on track. At around a mile into the trip, you can also turn right to take the hike to Dream Lake which is well worth the short trip. You can also access Mills Lake and The Loch from here if you would like, but we continued straight for Lake Haiyaha. At under 2.0 miles, you will arrive at the lake, which is absolutely stunning and mesmerizing. The color of the lake recently changed from a clear blue to a milky bright green. This was caused by a landslide in the park that happened just above the lake. Experts don’t know how long this will last… so see it while you can!!
Day 2
We woke up to start our hike to Cub Lake. This hike was so much different than our first hike. The scenery was much less snowy and more… warm? It’s hard to describe so we will let the pictures do the talking and summarize it into one simple word… beautiful! It’s a must-do.
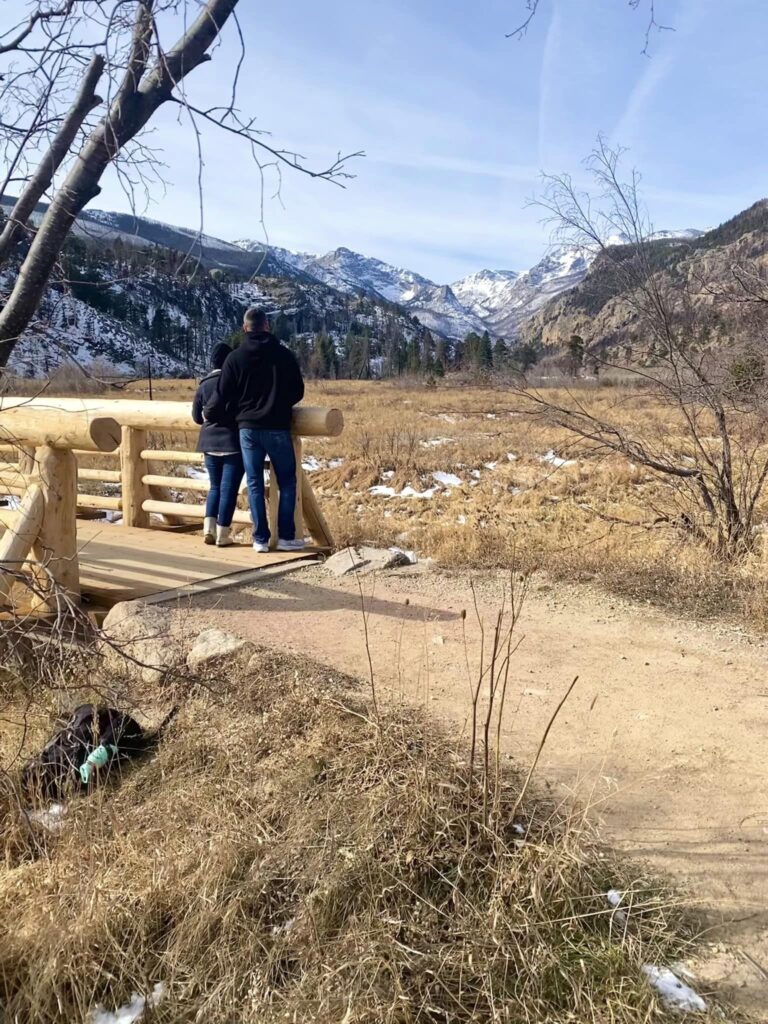
You start the hike to Cub Lake on an awesome bridge that overlooks a gorgeous mountain. This hike is a 5.2-mile out-and-back trail that’s considered a moderately challenging route. You will be on flat ground until the halfway part where you will begin to go uphill. This is where the hike begins to become a little snowier. Honestly. The hike to Cub Lake was even better than Cub Lake itself. Check out the awesome ranges in scenery you can get on this hike!
Day 3
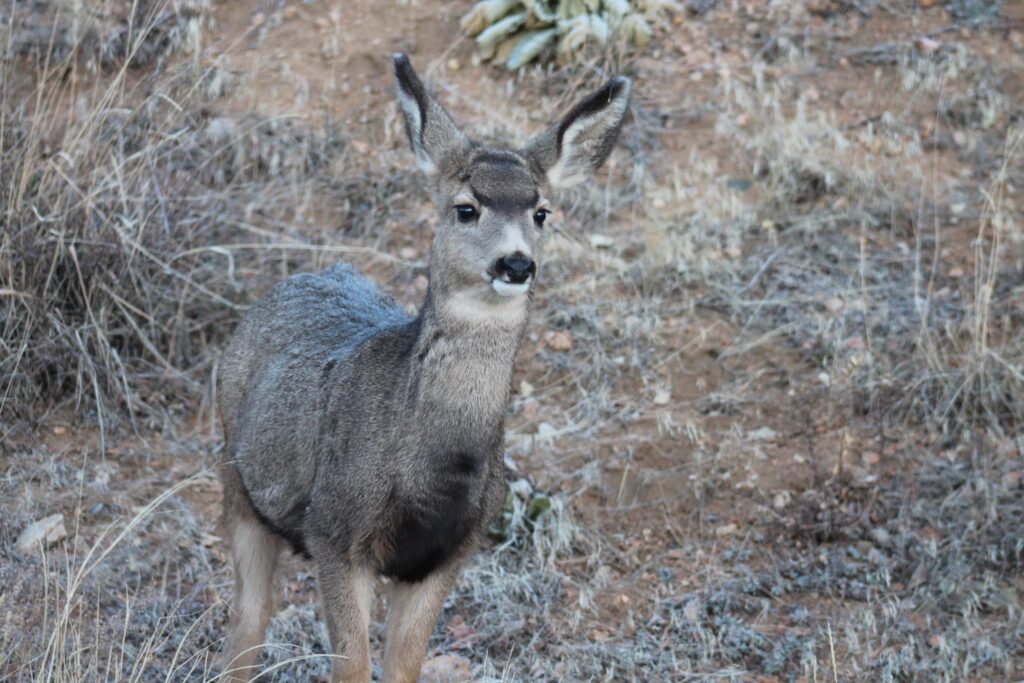
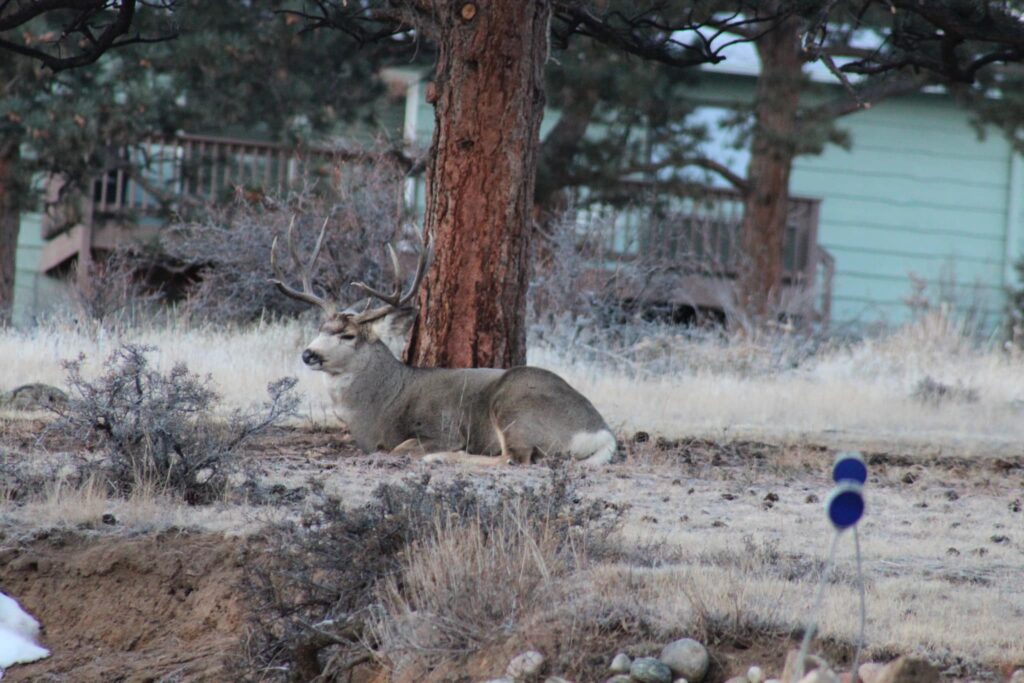
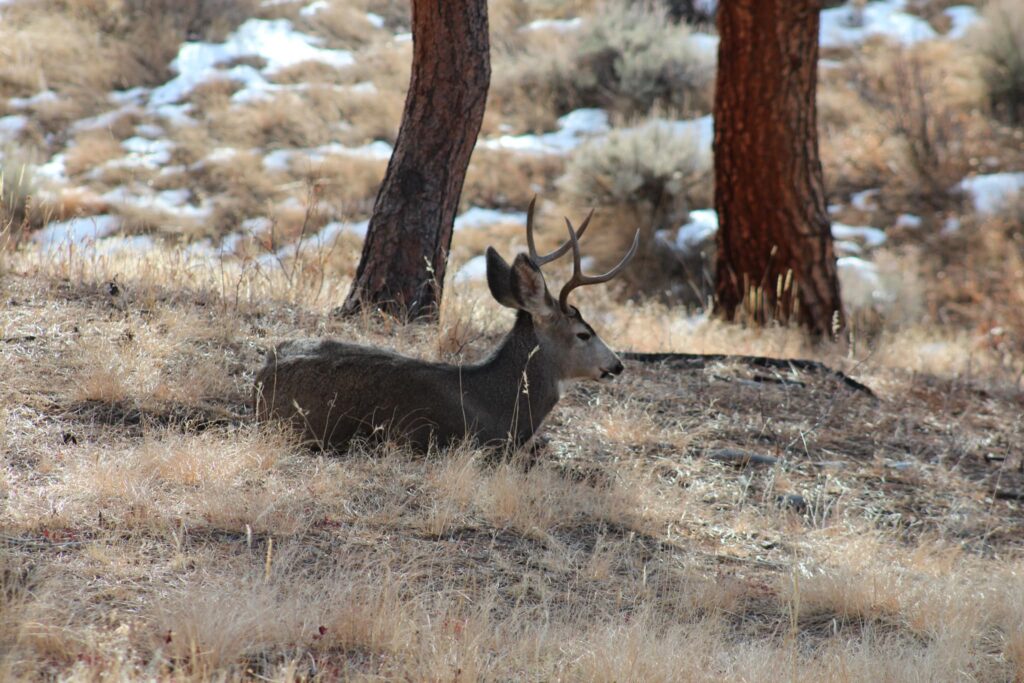
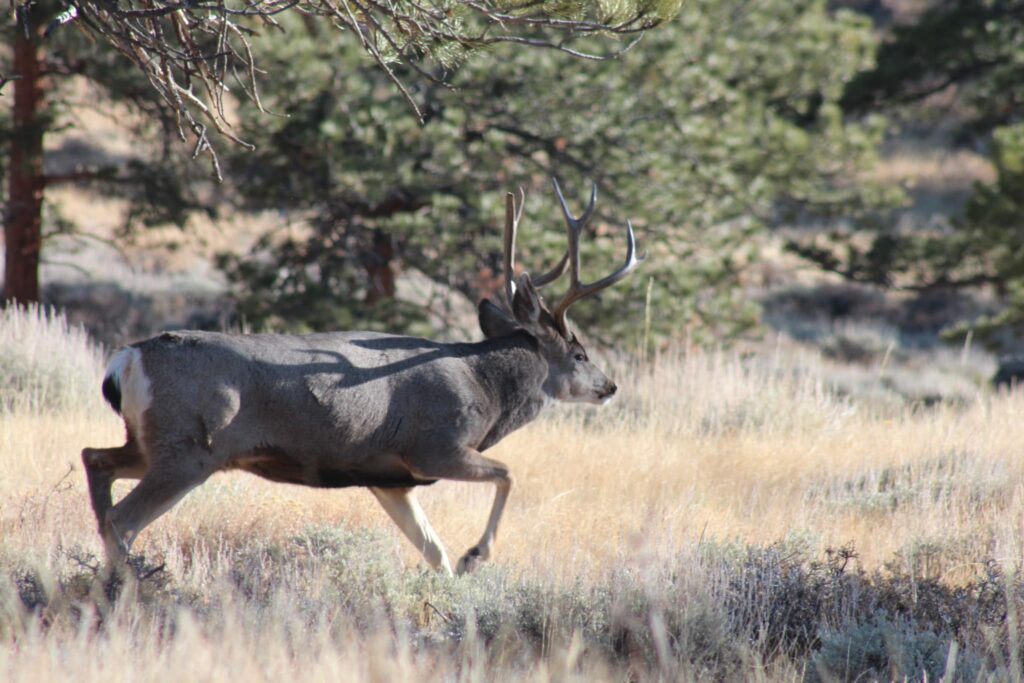
We intend to keep it 100% on this blog. We were exhausted after two days of hiking. We flew in from KY where the elevation is nowhere close to the elevation we were experiencing here. Take for example, the elevation in our hometown is 869 feet, and the highest elevation we went to was 10,240. This was a major adjustment and I think it was catching up to us on day 3. We intended to hike to Alberta Falls but changed plans to enjoy a shopping day and a trip to the Stanley Hotel. We also decided to check out some of the overlooks on the roads in RMNP to try to spot some wildlife. The best place to spot wildlife in the park would be Deer Mountain… where you guessed it, we found tons of deer. We spent a lot of time attempting to find Elk and were just not having any luck… stay tuned for details on our morning leaving where we found the Elk… like literally all of them! One tip for adjusting to high altitudes: Drink a lot of water… more than you think you need to because your body will dehydrate quicker. You can get altitude sickness from changing elevations so quickly so monitor your symptoms and seek medical attention if you become ill.
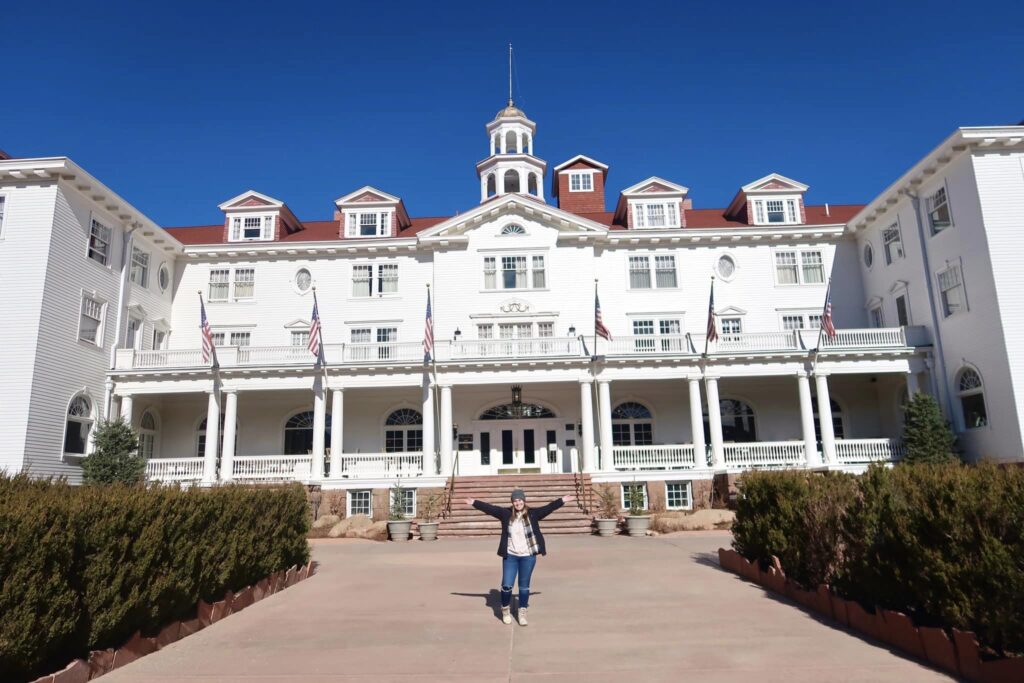
Estes Park has an adorable shopping strip which we hit early in the morning for some coffee and tees. We later visited the Stanley Hotel which has no entrance fee unless you book a guided tour. As soon as you enter Estes Park, you will see the famous hotel nestled atop a mountain overlooking Estes Park. You are free to walk around the famous hotel which is impressively large. Originally, the hotel was built for the tourism that Estes Park was receiving. This hotel is now famous because it served as the inspiration for the Overlook Hotel in the novel The Shining by Stephen King. This hotel is also famous because the Dumb and Dumber movie was shot here! Before heading into the hotel, make sure to check out the miniature hedge labyrinth. Inside, be sure to check out the lobby, basement, and gift shop!
Where to Eat
There were so many great places to eat! We ate at Grubsteak Restaurant, Antonio’s Real New York Pizza, and Hunter’s Chophouse. Hunter’s Chophouse was by far the best place we ate. Be sure to try out some Elk while there! We also enjoyed some great coffee at Kind Coffee which is right in the heart of Estes Park!
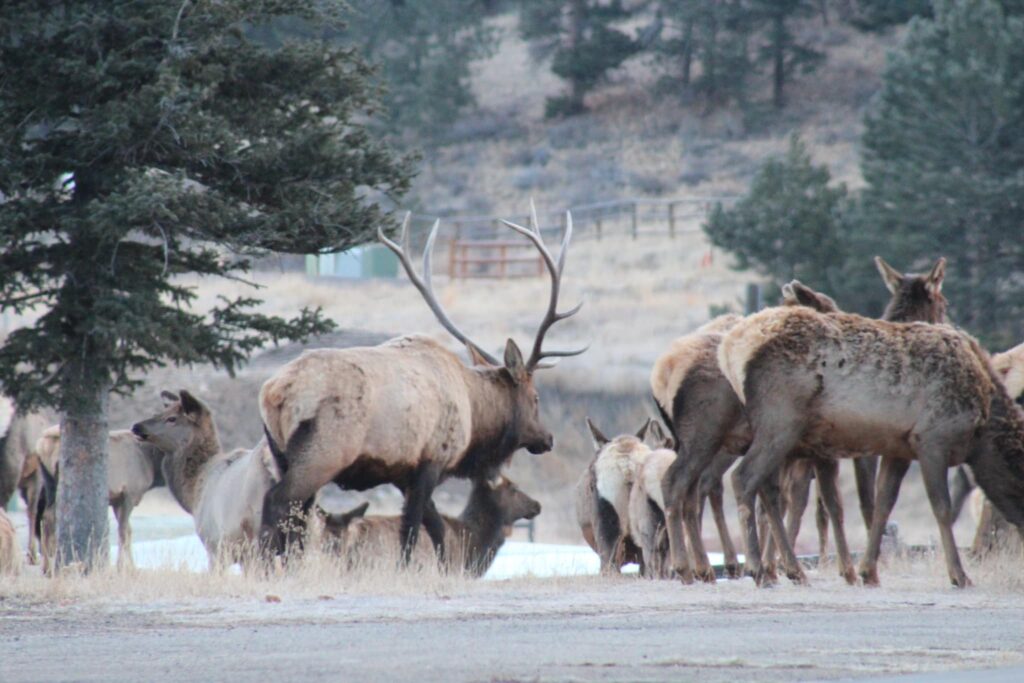
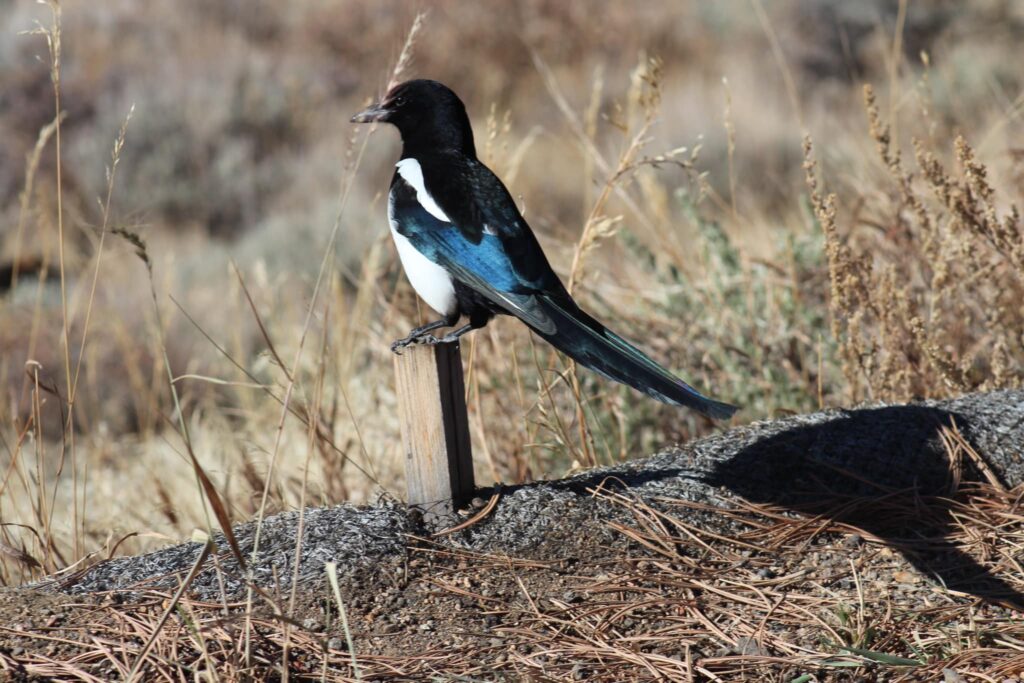
Where to See Wildlife
As noted, we struggled to find the Elk. This was surprising to us as we expected to stumble into Elk in the area. Within the park, we found many deer on Deer Mountain. I mean, it really does live up to its name. We knew that dusk and dawn were the best times to see any wildlife and we searched the roads daily at these times looking everywhere we could. On the last morning…. We found them! Do yourself a favor and check out the golf course. This is where we saw a herd of at least 100 Elk. This truly was a once-in-a-lifetime experience, and we were in awe. We were almost late for our flight because we spent our morning watching this massive herd! We snapped plenty of pics and then sit back and enjoyed watching them graze on the golf course.
More Wildlife!!
Want to learn more about what to pack for your trip to RMNP
during the winter? Stay tuned for a future blog that will detail everything you
will need! We hope this blog helps you
plan your next trip to RMNP. Please, reach out to us on Instagram if you have
any further questions. Safe travels y’all – Justin & Caitlin